This post may contain affiliate links. I may earn a small commission off of at NO extra cost to you. For more info, view my Privacy Policy.
The Wattle Stitch, is one of the newest stitches that I have learned to crochet. And, all I can say, is that I absolutely love it!!! Who knew you could make so much texture in a project by just alternating 3 different stitches.
Find the written, picture and video tutorials below!
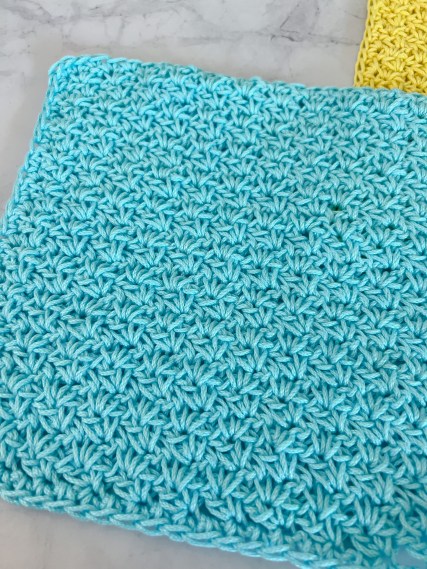
Here’s what it looks like –

This sample was worked up in a 100% cotton yarn.
Here is what it looks like worked up in an acrylic yarn –

It has such a pretty look and texture that it would make a great stitch to use for so many different things. Like baby blankets, hats, scarves….even washcloths!
Did I mention that it’s also a super easy stitch? After the first row, it’s just a 1 row repeat, how easy is that!?
Be sure to Follow me on Social Media to never miss anything NEW!
PIN this pattern to save for later!

Check out Some of my Other Stitch Tutorials!

- Waffle Stitch in a Square
- Iris Stitch
- Puff Stitch
- Star Stitch
- Flower Granny Squares
- Solid Granny Squares
- Basic Granny Squares
- Alpine Stitch
I have included the written tutorial, along with some pictures and a full video tutorial for this stitch! If you enjoy my tutorials, please be sure to SUBSCRIBE to my Youtube Channel! Thank you so much for your support!
Pattern
Things you will need:
- (Any yarn with corresponding hook will work.)
- Scissors
- Yarn Needle
Abbreviation / Stitch Key:
- ch = chain
- st = stitch (es)
- sk = skip
- mc = magic circle / ring
- sc = single crochet
- dc = double crochet
- sp = space
- yo = yarn over
- t = turn
How to Crochet the Wattle Stitch –
This stitch can be started by chaining any Multiple of 3.
I started mine by chaining 21
Row 1: in the 3rd chain from your hook, work (sc, ch 1, dc) in same st, * sk 2 ch st, (sc, ch 1, dc) in next st* repeat * to * across until you reach last 3 stitches, sk 2 st, sc in very last st

Row 2: ch 1, t, *sk next sc, dc, (sc, ch 1, dc) in ch 1 sp* repeat across, sc in very last st


Continue repeating row 2 for as many rows as you’d like! And that is how easy it is to crochet the Wattle Stitch!
I’d love to see your creations that you make from all of my patterns, be sure to tag me @okiegirlblingnthings on Instagram so I can see. Whether you crochet this wattle stitch or something else entirely, tag me!


Thank you so much for the tutorials. I haven’t been crocheting for very long so this is very helpful.
Mona.
You’re welcome! Glad you found it useful!!! 😊