
This post may contain affiliate links. I may earn a small commission off of at NO extra cost to you. For more info, view my Privacy Policy.
Anyone who knows me personally (or even if you have followed me on social media long enough) knows how much I LOVE Summer! So, I’m kinda sad in a way to see it go, BUT if it has to go away, at least I can make some cute, rustic pumpkins!
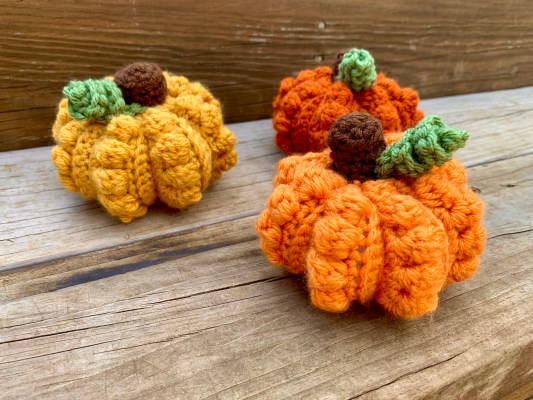
I absolutely LOVE using the Bobble stitch to give these pumpkins a little more rustic, farm decor feel. They would even be cute using small twigs and the leather tags instead of crocheting the top leaf and stem. I think that would give them the perfect farmhouse, rustic vibe.
Yarn I used –
I used I Love this Yarn from Hobby Lobby. I love using this yarn for amigurumi projects and well, basically for anything! It’s a super soft worsted weight yarn that is SUPER soft and not scratchy at all! It’s my go to for #4 yarn hands down!

The lighter Pumpkin is made in the color Glazed Desert, the darker one in Burnt Pumpkin, and the mustard one in Sungold. All the colors being the I Love This Yarn Brand. The Leaf color is Light Sage and the Stem is Brown
I think that even some dark teal and deep red pumpkins would be pretty! There are so many options that the possibilities are absolutely endless!
My Helper –
When I was trying to photograph this pattern I had a little bit of help…. or should I say a lot of help. George thought that I needed some help in arranging my rustic pumpkins. He was literally batting them like balls and knocking them off the steps.

I finally decided to give up and just included him in the photos. If you follow me on Instagram, you can see more behind the scenes of this photo shoot.
This little stinker is a complete Baby, LOL. He has to be the center of attention and get all the love he wants. That usually means being in the middle of anything that I’m doing outside. He’s primarily an outdoor cat, but sneaks through the open door as often as he can……which is like every single day.
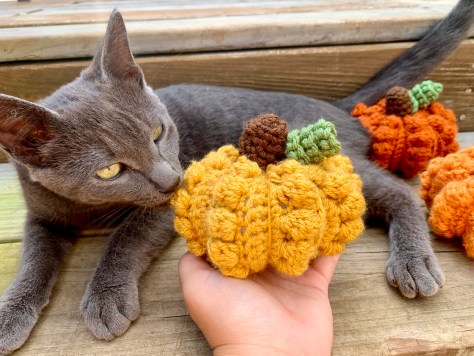
But, everyone loves a cute cat, right?!
Check out my other Fall Patterns!

Follow me on Social Media!
PIN this pattern to save for later!

Pattern
- You can purchase the ad-free, downloadable, printable PDF pattern in my Etsy shop Here Thank you so much for your support!
- Save to your Ravelry Queue Here
- Pin to Pinterest to save for later Here
- Subscribe to my Youtube channel Here
Things you will need:
- I Love This Yarn in Desert Glaze, Light Sage & Brown
- 4.00mm / G Crochet Hook
- Poly-Fil
- Yarn Needle
- Scissors

Finished Measurements – approx. 4.5” across and 3” tall
Abbreviation:
- ch = chain
- sc = single crochet
- blsc = single crochet in the back loops only
- mc = magic circle / ring
- t = turn
- st = stitch (es)
- Sl st = slip stitch
Special Stitch –
Bobble Stitch –
*yarn over and insert hook, pull up a loop (as if you were going to do a double crochet), yarn over and pull through 2 loops* repeat * to * 4 more times until you have 6 loops on hook, yarn over and pull through all 6 loops on hook. Bobble stitch made
- You always work a bobble stitch on a wrong side row
I have a step-by-step tutorial for the Bobble Stitch that also includes a video tutorial for a more in depth look on how to crochet the bobble stitch.
Notes –
- The pumpkin is made from a flat rectangle piece, so no crocheting in the round.
Go!
Row 1: ch 17, sc in 2nd ch form hook and in every ch st across (16)
Row 2 – 3: ch 1, t, blsc in each st across (16)
This the back loop –

Row 4: ch 1, t, * Bobble, sc * repeat * to * across (16)
Row 5: ch 1, t, sc across (16)
Rows 6 – 32: Repeat Rows 2-5 ending on a bobble stitch row
Cut yarn leaving a very long tail.

You will now fold the piece in half and stitch the 2 ends together so it will become a tube like shape.

Then turn the piece right side out

Take the tail on 1 end and weave it around the end of the pumpkin, pull the tail to close the hole


Stuff with poly-fil and close the top end.
Now, take a long tail and go through the very middle of the pumpkin and go all the way through to the other end. Gently pull the yarn and go back through the pumpkin, making sure the yarn go in between the bobble rows


Stem – with brown yarn
Round 1: 6 sc in mc (6)
Round 2: * sc in 1 st, 2 sc in next st* repeat * to * around (9)
Round 3: blsc in each st around (9)
Round 4 – 5: sc in each st around (9)
Cut yarn leaving a long tail to sew onto pumpkin
Leaf – with light sage
Ch 10, t, starting in the 2nd ch st from hook, work 3 sc in each st across
Cut yarn leaving a tail to sew onto the pumpkin
Sew the stem and leaf to the top of the pumpkin. Weave in all ends.

I hope that you have found this tutorial helpful! I love to see what everyone makes using inspiration from my blog! So, whether you make these Rustic Pumpkins or another one of my patterns, Be sure to tag me @okiegirlblingnthings on Instagram so I can see!


These are so adorable! If I have to let go of summer, I start stockpiling my pumpkin collection! LOL Thank you for this pattern!
Carri
Thank you for this freebie. Look forward for this newbie to give it a go.
Kylee, Thank you for the free pattern! These little Rustic Pumpkins are just too cute! I’m making three…an orange one, a light tan, and a white. I may make one big one in a dark burgundy and put these little guys around it. Thank you for sharing!! ❤🎃
Could you use a cinnamon stick or a piece of wood for the stem?
Yes, you could! Just use a hot glue gun to attach it to the top of the punpkin.
Hello, I do not see row three. On my screen its row 1, row 2, and then a picture of back loops only. Below the picture is row 4. I am not sure what to do next.
Row 2 is labeled Row 2 – 3, so you will repeat row 2 for row 3 also 😊