
This post may contain affiliate links. I may earn a small commission off of at NO extra cost to you. For more info, view my Privacy Policy.
I love the look of my Bella Beanies! They have a very interesting design but are super simple to make. I recently got my hands on some Vanna’s Choice Yarn
and I haven’t ever used it before, but I really like it. It comes in a variety of colors, which I really like. It seems like it is a thick worsted weight yarn (which I really like) unlike some worsted weight yarns that seem like they are thinner and should be a #3 light weight.

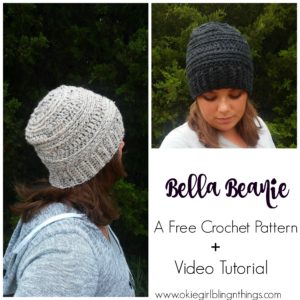
This one is done in the color Oatmeal and just look at it! This is the perfect fall neutral color. This would make a great go-to hat when you don’t know which one to wear, the color would match with anything.

Will fit a teen, average adult head of 21” – 23”
Pattern
- You can purchase the ad-free, downloadable, printable PDF pattern in my Etsy shop Here Thank you so much for your support!
- Save to your Ravelry Queue Here
- Pin to Pinterest to save for later Here
- Subscribe to my Youtube channel Here
Things you will need:
- 1 skein of Vanna’s Choice Yarn in your color choice (shop for Vanna’s Choice Here)
- I / 5.50 mm Hook
- Stitch Marker
- Yarn Needle
Abbreviation:
- ch = chain
- sc = single crochet
- blsc = single crochet in the back loop only
- sc2tog = single crochet 2 stitches together
- hdc = half double crochet
- hdc2tog = half double crochet 2 stitches together
- dc = double crochet
- dc2tog = double crochet 2 stitches together
- Sl st = slip stitch
Gauge:
- 12 st x 6 r = 4” in double crochet
Make sure to use correct hook to obtain the correct gauge.
Go!
Ch 8
Row 1: sc in 2nd ch from hook and in each ch
Across. (7)
Row 2: ch 1, t, blsc in each st across. (7)
Repeat row 2 until piece measures 17’’ unstretched. Once the piece is 17’’ long, being careful not to twist band, line the 2 ends up. Ch 1, and slip st in each st down the band. You now have the brim of your hat.
Row 3: ch 1, evenly sc 55 st around the brim of the hat. Join with a sl st into the 1st sc of the round (55)
Row 4: ch 2, hdc in each st around. Do not join with a sl st. You will now use your st marker. (55)
Row 5-7: hdc in the 3rd loop of each st around (55)
What is the 3rd loop? The 3rd loop of a hdc is the loop behind the normal top 2 loops.

You have your front loop and your back loop. The 3rd loop is right behind the back loop.

If you are still having trouble finding the 3rd loop, I have a Youtube video for this hat here
Row 8: dc in each st around. (55)
Row 9: hdc in each st around (55)
Row 10 – 12: hdc in the 3rd loop of each st around (55)
Row 13: *dc in 9 st, dc2tog* repeat * to * around (50)
Row 14: *hdc in 4 st, hdc2tog* repeat * to * until the last 2 st, hdc in last 2 st (42)
Work rows 15 – 17 in the 3rd loops only
Row 15: *hdc in 4 st, hdc2tog* repeat * to * around (35)
Row 16: *hdc in 3 st, hdc2tog* repeat * to * around (28)
Row 17: * hdc in 2 st, hdc2tog* repeat * to * around (21)
Row 18: *sc in 1 st, sc2tog* repeat * to * around (14)
Row 19: sc2tog around (7)
Cut yarn. Sew top together. If you would like to top your hat with a faux fur pom pom, find my tutorial for that here
Have fun and crochet away


Did you love this craft?
Make sure to comment below so we can chat about it! Or follow on your favorite social network for even more patterns and tutorials.